Gráfico web de Microsoft.
The newspaper LA JORNADA is going to show how to make a clean installation of Windows 10 on any Surface device, it could be a Surface Pro X, Surface Pro 7, Surface Pro 6, Surface Pro 5, Surface Pro 4, Surface Laptop 1 Surface Laptop 2, Surface Go, Surface Studio, Surface Book 1, Surface Book 2, Surface Pro 3 or Surface 3, Surface 2, Surface 1 or Surface RT.
Please follow the next steps to make it. You are going to need a USB stick between 16GB or 32GB, if you have one bigger then you will need to shrink it to any of those sizes. You cannot use an external hard drive or a Micro SD inside an USB adapter.
Follow the next steps…
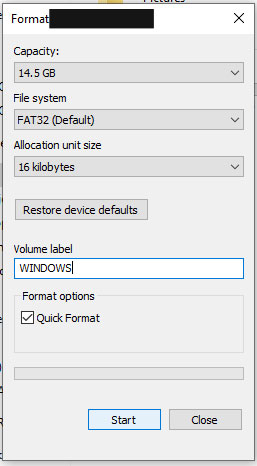
1. Plug the USB device into a Windows computer, then open This PC, locate the USB drive and right click on it. Select Format, select the option FAT32 in File System, in Allocation Unit Size set it to 16K and check on Quick Format, then hit Start
Captura de pantalla.
2. Now download the Recovery Image by going to the next address, you do not need to sign in… https://support.microsoft.com/en-us/surfacerecoveryimage
3. One you see the results, download the latest Version of Windows available, a folder will be downloaded
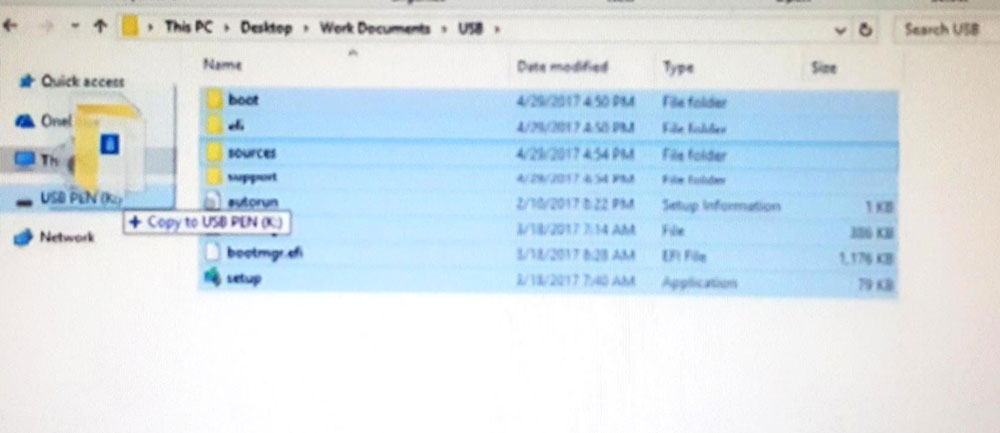
4. Once the Folder is downloaded drag and drop the files onto the USB stick, this process might take from 15 up to 30 minutes
Captura de pantalla.
5. After copying the files turn your Surface off
6. Insert the USB into your Surface and go to the Surface UEFI by holding the Volume Up button on the Surface and just pressing and releasing the Power Button but you keep holding the Volume Up
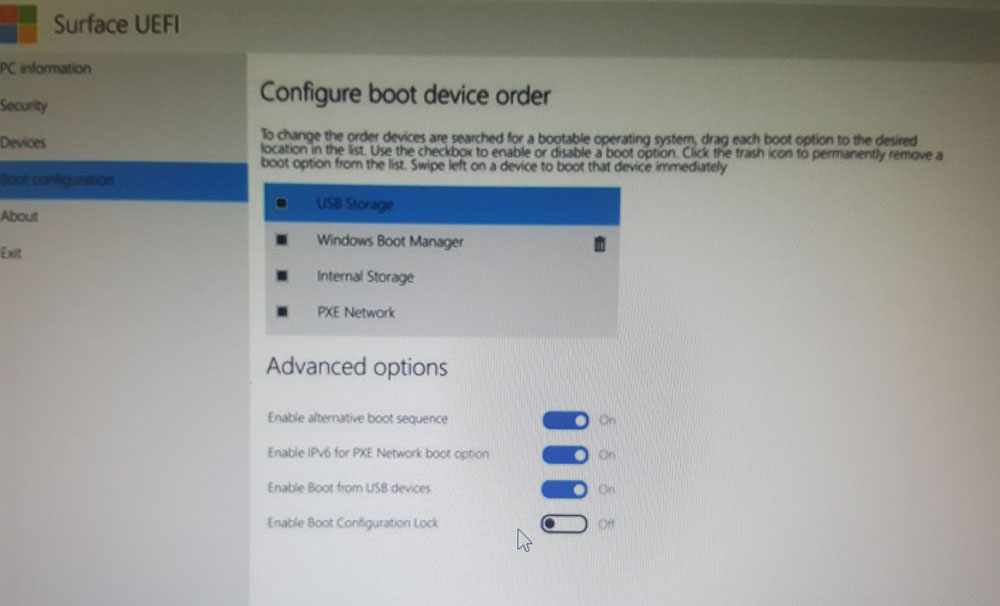
7. Once in the Surface UEFI go to Boot Configuration and drag to the top USB Storage
Captura de pantalla.
8. Select Exit and click on Restart. Note: If it does not boot from the USB then turn the Surface off and this time hold the Volume Down button on the Surface and just press and release the Power Button but keep holding the Volume Down
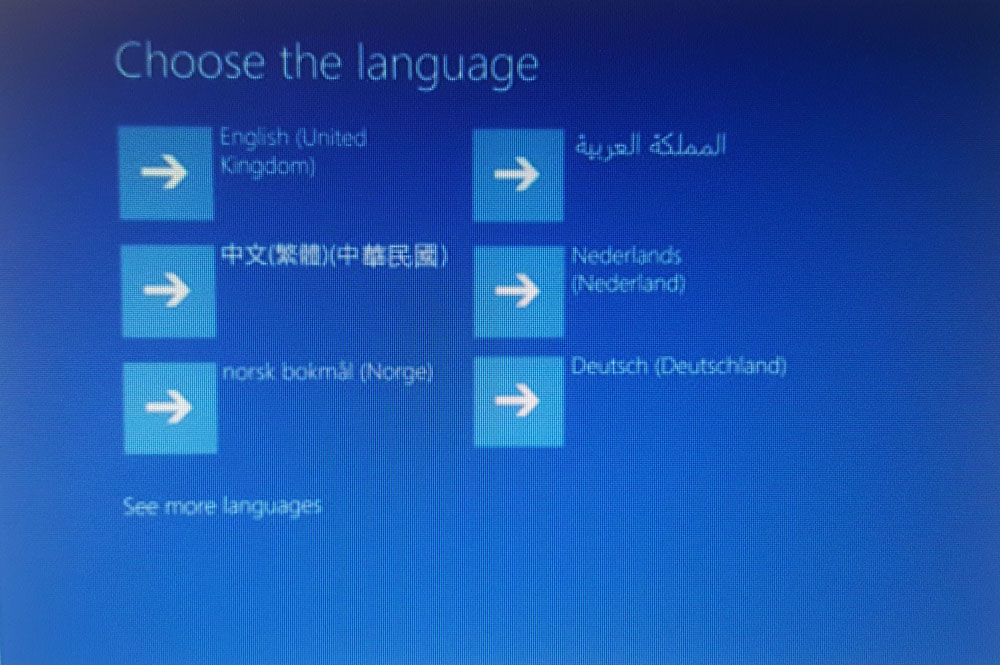
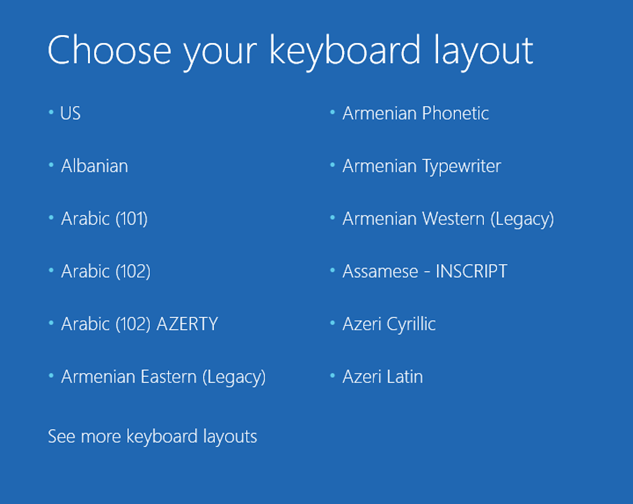
9. You will see Choose the Language and then Choose the Keyboard Layout
Captura de pantalla.
Captura de pantalla.
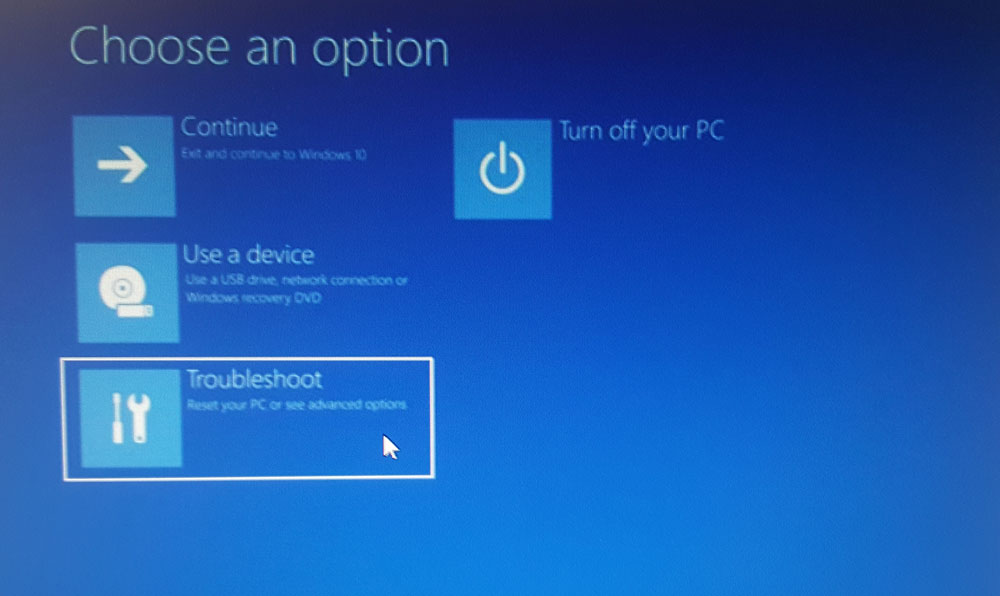
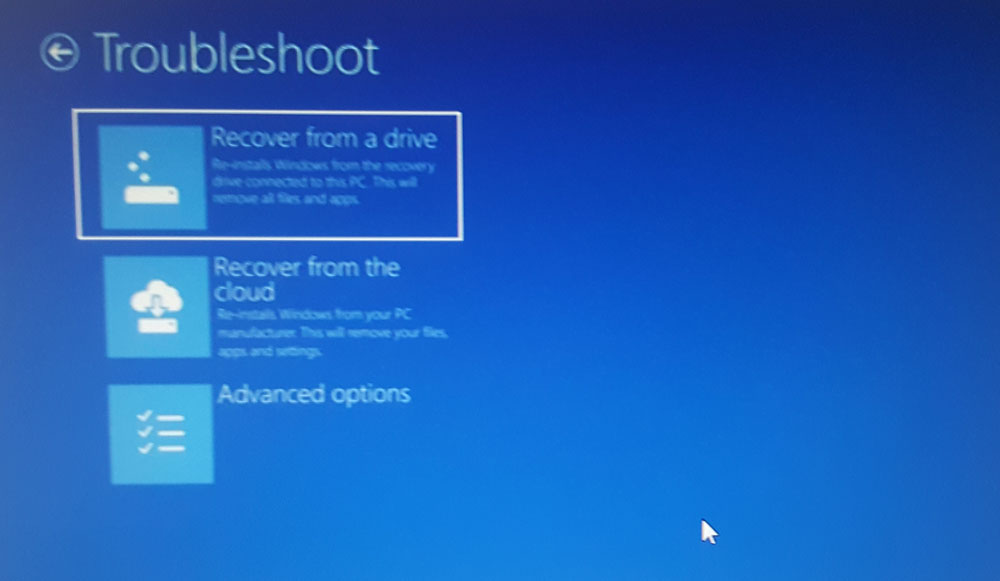
10. Then you will see Choose an Option and you Select Troubleshoot, then select Recover from a Drive and then select Skip this Drive
Captura de pantalla.
Captura de pantalla.
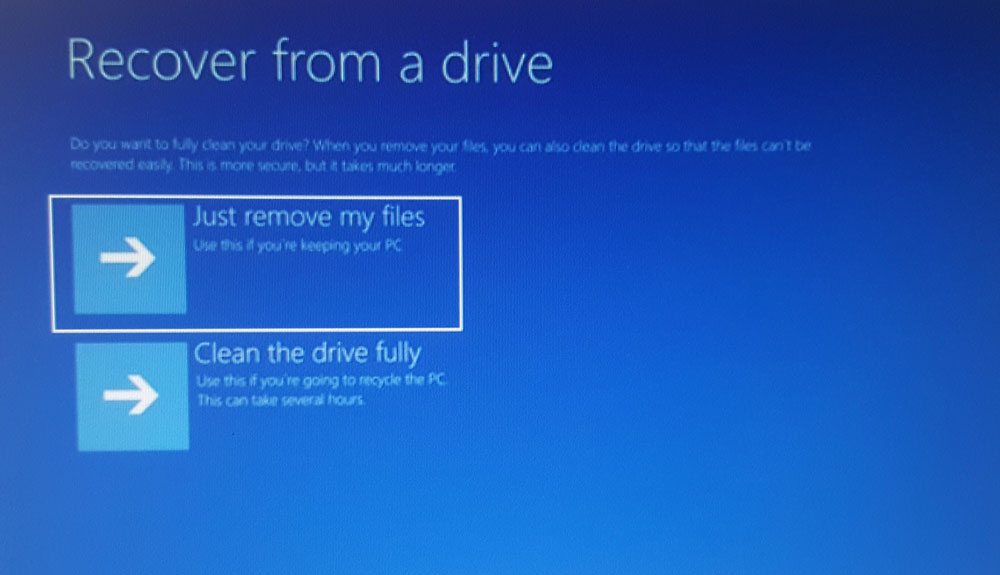
11. Then you will see Recover from a Drive and select Just Remove my Files, if you choose the other one it might take up to 2 hours to be completed
Captura de pantalla.
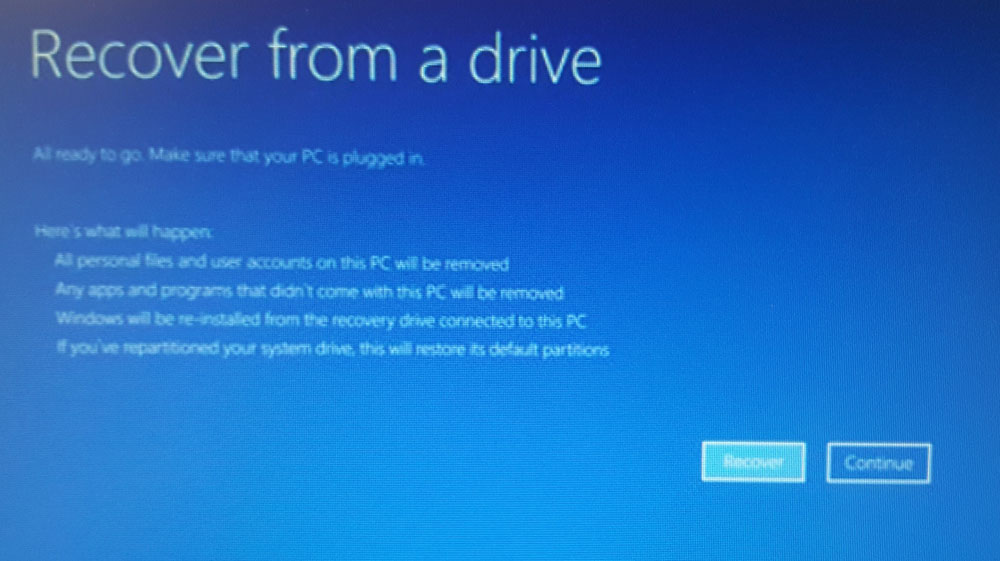
12. Then you will see Recover from a drive and hit Recover
Captura de pantalla.
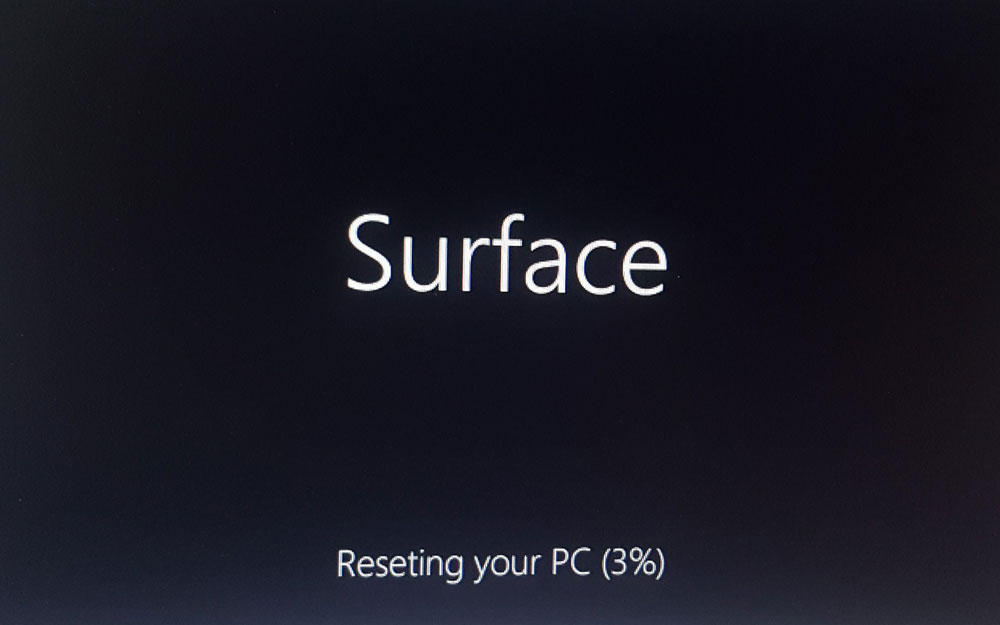
13. You will see the Surface logo with a black background
Captura de pantalla.
14. After some minutes you are ready to go, your Surface will restart and you can take out the USB stick
15. One the Surface restart you will see the initial set up of Windows, enjoy your computer

Initial page for installing Windows 10.


